How to Light Trees and Palms: Landscape Lighting Guide
Trees give a landscape its height, rhythm and identity. After dark, the right lighting can reveal their structure, create visual depth and help people navigate an outdoor space. The wrong approach, however, can flatten the tree, cause glare or send unnecessary light into the night sky.
This guide explains how to light trees and palms by matching the lighting technique, beam angle and luminaire position to the shape of the plant and the effect you want to create.
Start With the Tree, Not the Fixture
Before selecting an outdoor luminaire, study the tree from the main viewing direction. Consider:
- Height and canopy width: A tall, narrow palm needs a different beam from a broad rain tree.
- Trunk and bark: Textured trunks respond well to light placed close to the tree.
- Canopy density: Dense foliage reflects more light; open foliage produces stronger shadows.
- Viewing direction: Decide whether the tree will be seen from one side or from several positions.
- Seasonal growth: Allow for expanding canopies and changing foliage.
- Surroundings: Check nearby windows, paths, seating areas and ecologically sensitive zones.
The objective is not to make every leaf equally bright. Good tree lighting uses highlights, shadows and darkness to make the landscape feel natural and three-dimensional.
Choose the Right Tree-Lighting Technique
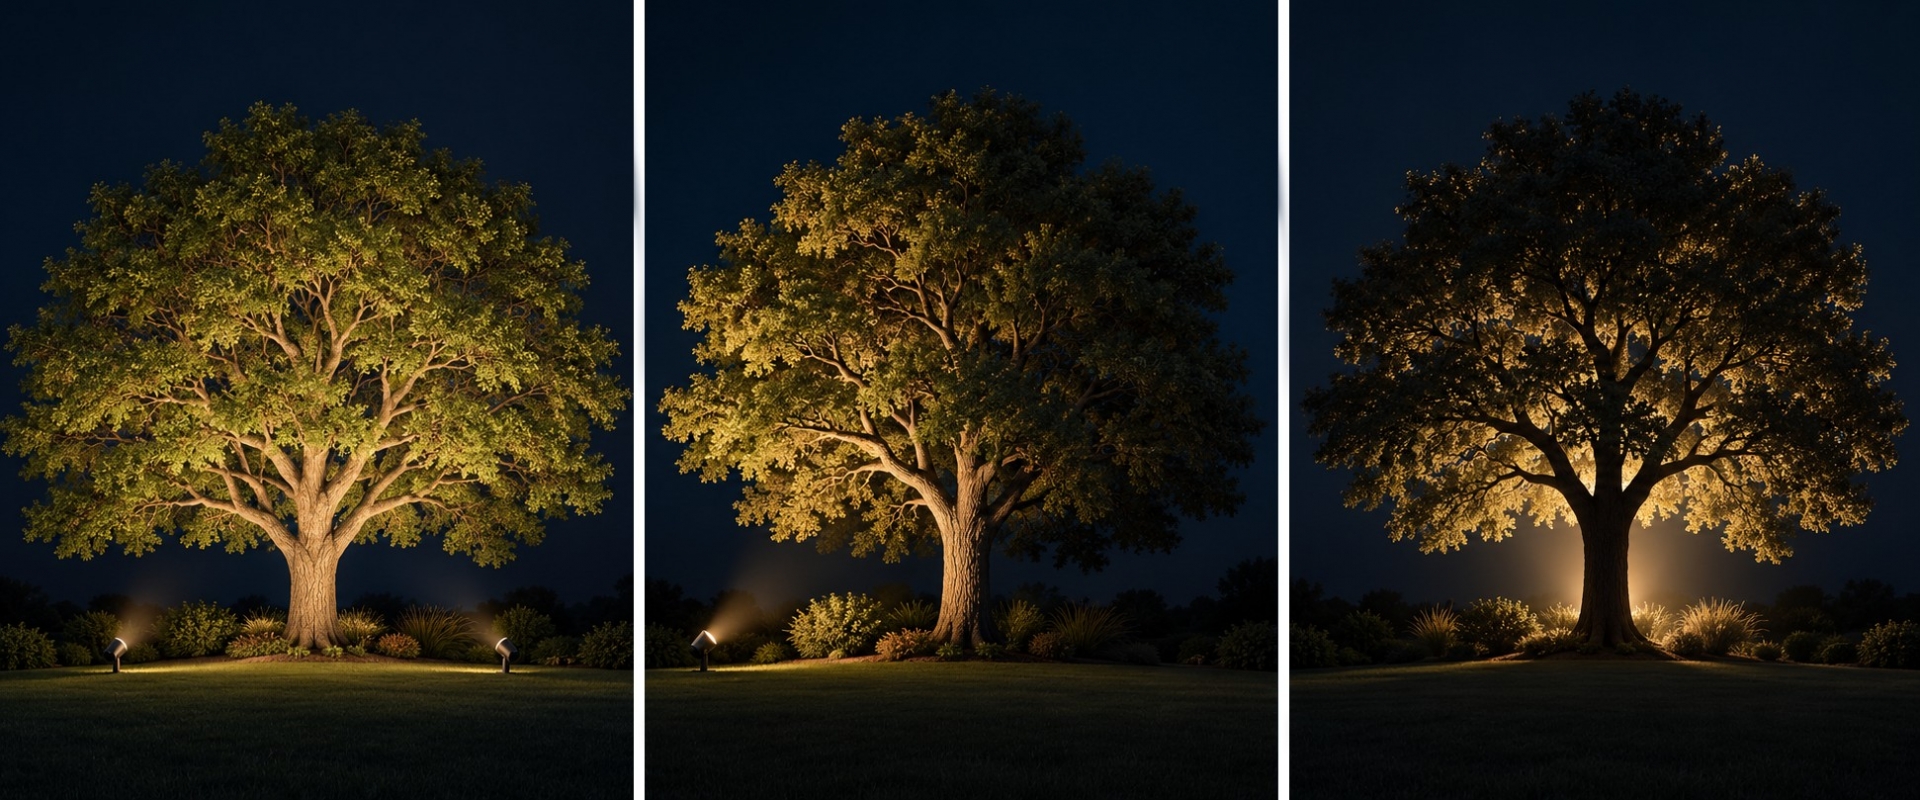
Front lighting: clear and uniform
Positioning a luminaire in front of the tree makes the trunk and canopy easy to recognise. It is useful when the tree acts as a landmark or must be visible from a principal viewpoint. Because the effect can appear flat, aim the light slightly off-centre or add a second, lower-output light where more depth is required.
Side lighting: more texture and depth
Light arriving from one or both sides produces highlights and shadows across the trunk and foliage. This makes mature trees, sculptural branches and textured bark appear more three-dimensional. Cross-lighting from two offset positions can create a balanced result without illuminating the tree uniformly from every direction.
Backlighting: a dramatic silhouette
Place the luminaire behind the tree and direct it toward the canopy to define the outline against a softly illuminated background. This works especially well for distinctive foliage and trees viewed from a terrace, lobby or restaurant. Shield and aim the luminaire carefully so that the source is not visible from the viewing position.
Uplighting: emphasizing height
Uplighting from ground level draws attention to the trunk and vertical structure. A luminaire positioned close to the trunk creates grazing light and stronger texture. Increasing the distance allows the beam to cover more of the canopy. Always keep the beam within the tree to limit spill light.
Downlighting and moonlighting: a natural effect
A shielded luminaire mounted above eye level can cast soft light through branches and create natural-looking shadows on the ground. This technique can illuminate both the tree and the area below it, but installation, access and glare control must be considered from the beginning.
How to Light Palm Trees
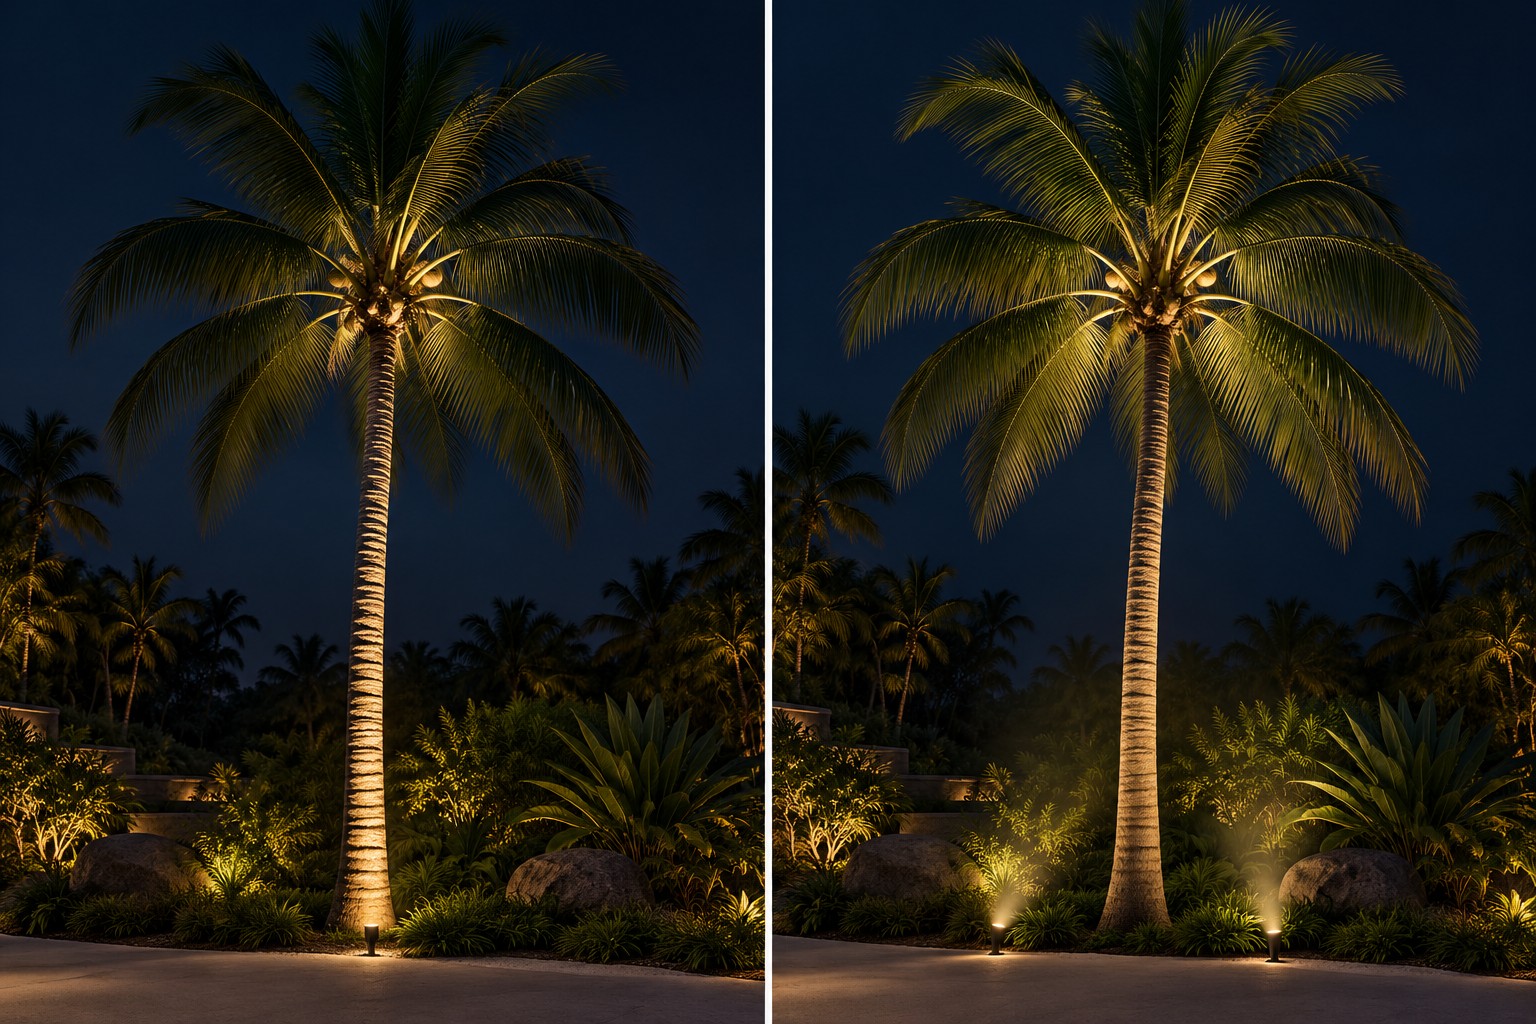
Palms present a particular challenge: their trunks are tall and narrow, while the crown spreads outward at a much greater height. A wide beam used from ground level may waste light around the trunk, while a very narrow beam may reach the crown without revealing the fronds.
For an effective result:
- Use a narrow or narrow-medium beam to follow the trunk and reach the crown.
- Position the luminaire close enough to reveal the trunk texture, but verify that the beam can still reach the fronds.
- For a fuller three-dimensional effect, use two luminaires from offset positions rather than increasing the output of one fixture.
- Aim each beam into the crown not past it into the sky.
- Use shielding where the luminaire may be seen from paths, guestrooms or seating areas.
For a row of palms, maintain a consistent visual rhythm, but commission each luminaire individually. Natural variations in height and crown shape may require different aiming angles.
Select the Beam Angle for the Tree Shape
Beam angle should be based on the size of the target and the distance between the luminaire and the tree.
|
Tree form or application |
Useful starting point |
Intended effect |
|
Tall palm or narrow trunk |
Narrow beam |
Emphasises height and limits spill light |
|
Slender tree with vertical crown |
Narrow or vertical elliptical beam |
Follows the shape more precisely |
|
Medium ornamental tree |
Medium beam |
Balances trunk and canopy illumination |
|
Broad-canopy tree |
Wide beam or multiple controlled beams |
Covers the canopy and creates depth |
|
Group of trees |
Combination of narrow and wide beams |
Builds foreground, middle-ground and background layers |
|
Textured bark |
Narrow beam placed close to the trunk |
Creates grazing light and stronger texture |
These are starting points rather than fixed rules. A lighting mock-up is the best way to confirm the beam, aiming angle and output before installation.
Inground Light or Adjustable Spotlight?
Both can produce effective tree uplighting, but they solve different project needs.
Inground luminaires integrate discreetly into paving or planting areas and keep the daytime landscape visually clean. They require careful drainage, waterproof cable connections and access for maintenance. Adjustable optics are valuable because final aiming can be completed after installation.
Spike or surface-mounted spotlights are easier to reposition as a tree grows or the planting scheme changes. They are particularly useful in soil and soft landscape areas. Their location should avoid garden equipment, irrigation spray and direct views of the light source.
Unilamp offers both approaches. Adjustable spotlight families such as ALPHA, KUBIK and SONIC provide different outputs, beam distributions and mounting accessories for tree and landscape applications. For discreet ground-integrated lighting, ARC and QUARK inground luminaires provide alternatives for projects with different output and installation requirements.
The final selection should be verified against the current product specification, photometric file, installation environment and required control system.
Final Design Considerations
For most gardens, resorts and hospitality landscapes, 2700K or 3000K creates a warm, comfortable appearance that complements timber, stone and tropical planting. A cooler 4000K light may suit contemporary or civic projects, depending on the surrounding materials and nighttime environment. Good color rendering and consistent color quality also help bark, leaves and landscape materials appear more natural.
Tree lighting should illuminate the tree not the viewer or the sky. Keep luminaires outside normal sightlines, aim each beam within the trunk or canopy, and use snoots, glare shields or honeycomb accessories where necessary. Dimming, timers and photocells can help balance the lighting, reduce energy use and limit unnecessary operating hours.
Before finalising the design, confirm:
- Tree height, canopy size and main viewing direction
- Lighting technique, beam angle and output
- Color temperature and color consistency
- Glare-control accessories and lighting controls
- IP rating, corrosion resistance and installation conditions
- Drainage and waterproof connections for inground luminaires
- Access for aiming, cleaning and maintenance
- Allowance for future tree growth and re-aiming
Avoid making every tree equally bright. Preserving selected areas of darkness improves visual hierarchy, adds depth and helps protect the nighttime character of the landscape.
Design With Precision
Successful tree lighting is created through precise distribution and careful aiming not simply more light. Begin with the form of the tree, select the effect, test the beam and preserve enough darkness for the landscape to retain its depth.
For technical consultation, project-specific guidance, or product inquiries, please contact the Unilamp team at online@unilamp.co.th